Painting Track
A bit behind in sharing some construction stories. Frankly I post these just as much to remind myself what I did and used as it is to share the story with others who may want to know.
To me, track always looks better painted. The bright silver side profile with the plastic reflective ties just takes so much away from the realism. I know some who painstakingly hand paint ties and the sides of the rail. I just don't see that as practical for the amount of track I need to do. I also didn't want to spend the money on pre-weathered rail. I used the basic Atlas code 83 flex track and turnouts. Cheapest stuff out there.

My go-to is Rust-Oleum's Camo paints, offered in spray cans. It is opaque, dead flat, and goes on both metal and plastic without any issue. The Earth Brown color is closest to the look I am wanting.


WARNING: This is an oil-based paint. So when spraying, be sure to use a LOT of ventilation! Furthermore, when spraying, it will atomize and basically create a haze of fine paint dust in the room. USE A RESPIRATOR! This is serious stuff so don't take it lightly!
First step is to protect the areas where you really don't want to get paint. I go through and add a piece of masking tape to the points and stock rails at each turnout. The Atlas switches also have a metal plate for conducting the power to the points. You may want to protect other key places.


That said, the application is pretty straight forward. Thoroughly shake up the can and have at it. I like to use a piece of cardboard to protect the backdrop and other scenery. Keep the can moving or it'll goop up. The paint covers very effectively, so a couple or three coats is all that is needed to get great coverage.

When done, it already looks MUCH better!
Now for the work-saving step. Note the tops of the rails are covered in paint. Unless you are running dead-rail, you will want these cleaned. WHILE the paint is still wet, take a paper towel and wrap it around a 1x2 or some other piece of scrap wood. Wet with some paint thinner and rub the tops of the rails. (Again, protect yourself - wear some rubber or latex gloves.) You WILL need to change the paper towel out A LOT. But if you get to it relatively quickly, the paint comes right off!


To me, track always looks better painted. The bright silver side profile with the plastic reflective ties just takes so much away from the realism. I know some who painstakingly hand paint ties and the sides of the rail. I just don't see that as practical for the amount of track I need to do. I also didn't want to spend the money on pre-weathered rail. I used the basic Atlas code 83 flex track and turnouts. Cheapest stuff out there.


WARNING: This is an oil-based paint. So when spraying, be sure to use a LOT of ventilation! Furthermore, when spraying, it will atomize and basically create a haze of fine paint dust in the room. USE A RESPIRATOR! This is serious stuff so don't take it lightly!
First step is to protect the areas where you really don't want to get paint. I go through and add a piece of masking tape to the points and stock rails at each turnout. The Atlas switches also have a metal plate for conducting the power to the points. You may want to protect other key places.


That said, the application is pretty straight forward. Thoroughly shake up the can and have at it. I like to use a piece of cardboard to protect the backdrop and other scenery. Keep the can moving or it'll goop up. The paint covers very effectively, so a couple or three coats is all that is needed to get great coverage.

 |
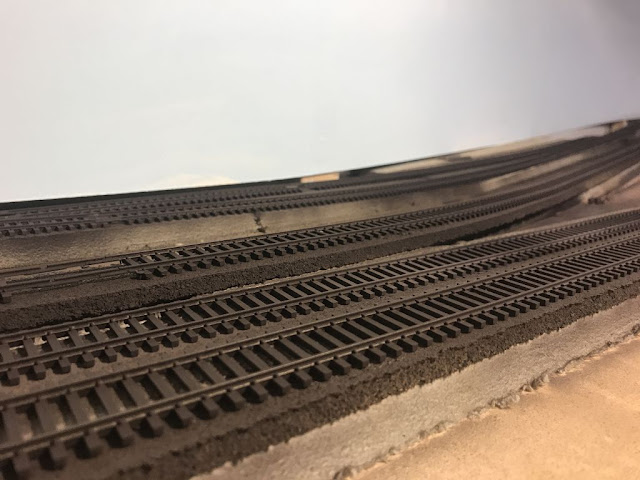
| I like to spray at a bit of an angle to be sure to cover the web of the rails. |
When done, it already looks MUCH better!
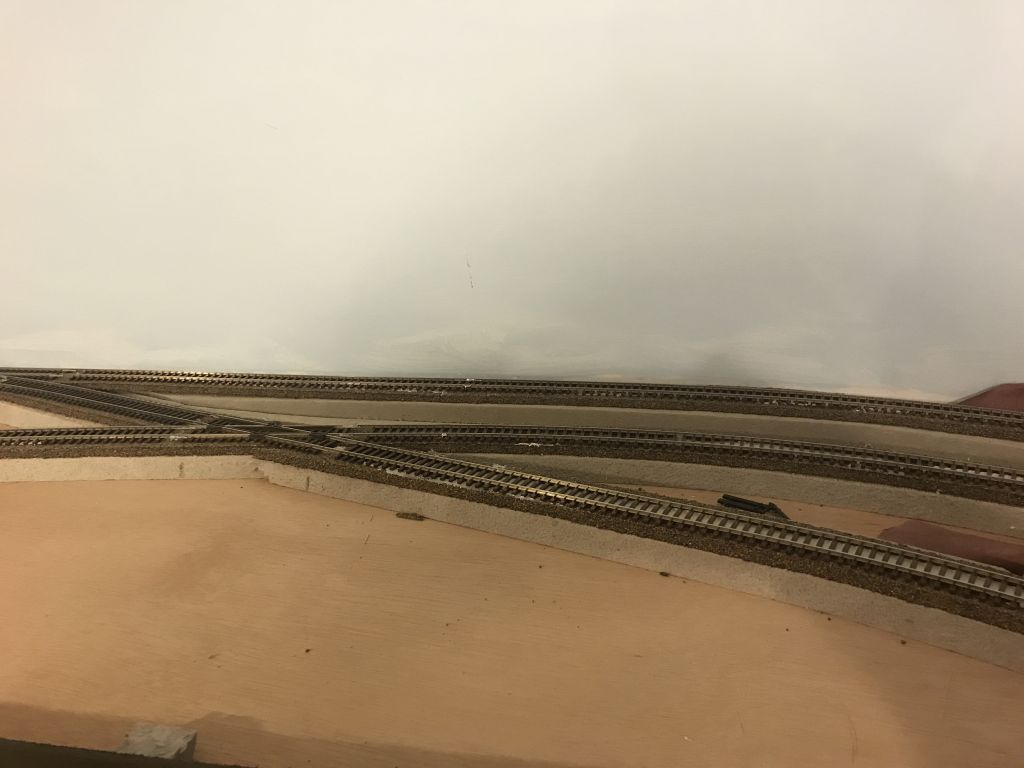
 |
| Yes, if I had thought about it, would have been good to install ties in the gaps where I have jointers! |

Now for the work-saving step. Note the tops of the rails are covered in paint. Unless you are running dead-rail, you will want these cleaned. WHILE the paint is still wet, take a paper towel and wrap it around a 1x2 or some other piece of scrap wood. Wet with some paint thinner and rub the tops of the rails. (Again, protect yourself - wear some rubber or latex gloves.) You WILL need to change the paper towel out A LOT. But if you get to it relatively quickly, the paint comes right off!


And - BOOM! - There it is:

Track is now ready for ballast and surrounding scenery!


Comments
Post a Comment