Wiring, Controls, LCC and Turnouts
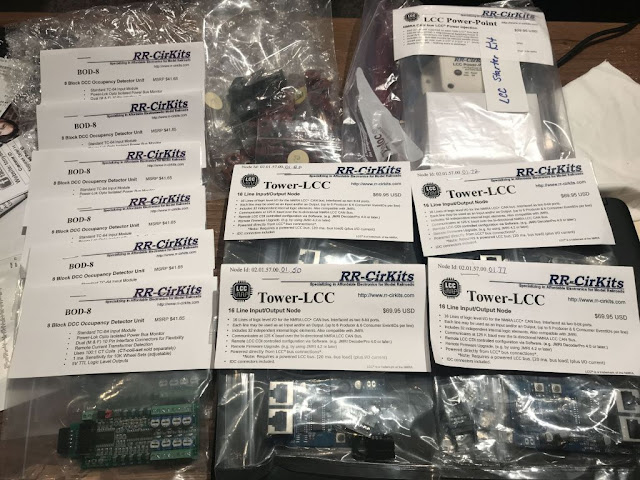
Progress continues, and wanted to share some ideas for those who may care. Received my first package of LCC components and starting thinking about how to lay out the nodes.
One thing my good friend Dave Cochrun did on his layout was mount the controls onto a board that is easily accessible to wire and maintain. What a concept! In the past I attached my control pieces onto the benchwork... which means crawling under the layout for every little thing. No more! Cut a couple pieces of plywood 14" x 24" and wa-la, a perfect place to mount components. I painted them white to give it a little more finished look and feel.

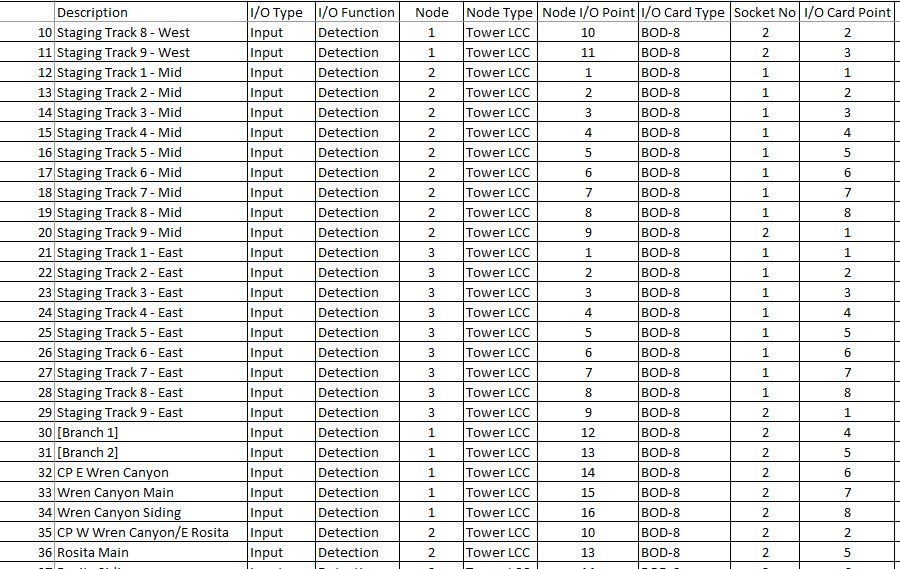
Next to lay out the components. First step is to figure out what inputs and outputs I have from each part of the layout. Being a bit of a nerd, I built up a spreadsheet in Excel to assign points. Really this is important for whatever wiring you may do. If this step is skipped, you will get lost in sorting it all out in real-time. Here is a snapshot of what my I-O list looks like. Note I still need to assign the LCC node info.

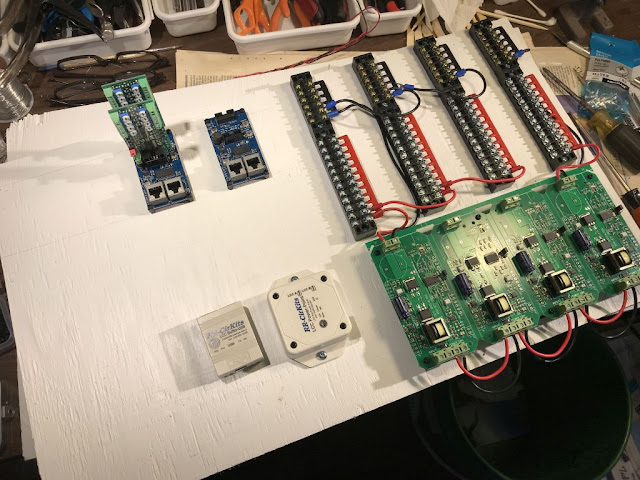
Next is physically laying out the components. I tried several arrangements before landing on this one. TIP: sketch up your layout... and then pencil in how you will run the wires. You'll discover wiring take a lot of room, so plan for them right up front. Here is a snap of when I was playing the with the layout of the first panel.

Note I ended up moving the breaker board to the front to allow more room for wiring in the back, where it would be out of the way.
I never liked mounting electronics directly to the support surface - no chance for heat to escape and what if something conductive finds its way back there. A quick look on Ebay and I found boxes of nylon standoffs, complete with screws for just a couple bucks. Note they are all threaded. I simply drilled a 7/64" hole in the plywood and the standoffs threaded right into the wood.


A bit of work and time, and the board was ready to go! Note I am using screw type terminal blocks to feed the power busses. They area also from Ebay, and include these snazzy jumper bars. I like how it turned out.

Back in the layout room, I build up a frame out of 1x2s to support the board. Wiring started immediately there after. A lot of wiring to do! But it feels good to get things moving along.

If you look closely, you'll see I added CT's on the red wires for track detection. I debated reducing the number of bus wires back to this panel and put the CTs by the feeders, or run them all back to a single point. Running them all back certainly took a lot more wire, but I think the maintenance will be easier this way. We will see. I will probably have another subpanel to marshal some of these feeders as well.
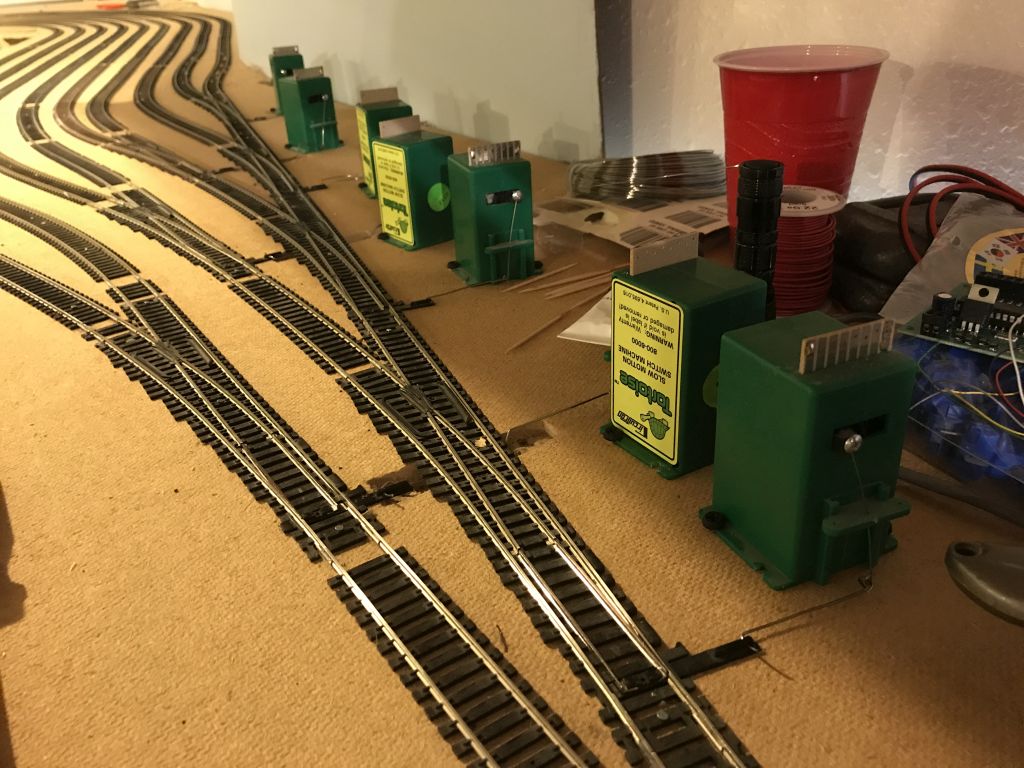
I ran out of "suitcase" connectors to connect the track feeders to the power busses, so I went on to mounding switch machines for the eastbound end of the staging yard.

More LCC equipment on the way, specifically for powering the turnout motors. I'll send out an update on that when I get further alone.

One thing my good friend Dave Cochrun did on his layout was mount the controls onto a board that is easily accessible to wire and maintain. What a concept! In the past I attached my control pieces onto the benchwork... which means crawling under the layout for every little thing. No more! Cut a couple pieces of plywood 14" x 24" and wa-la, a perfect place to mount components. I painted them white to give it a little more finished look and feel.

Next to lay out the components. First step is to figure out what inputs and outputs I have from each part of the layout. Being a bit of a nerd, I built up a spreadsheet in Excel to assign points. Really this is important for whatever wiring you may do. If this step is skipped, you will get lost in sorting it all out in real-time. Here is a snapshot of what my I-O list looks like. Note I still need to assign the LCC node info.
Next is physically laying out the components. I tried several arrangements before landing on this one. TIP: sketch up your layout... and then pencil in how you will run the wires. You'll discover wiring take a lot of room, so plan for them right up front. Here is a snap of when I was playing the with the layout of the first panel.

Note I ended up moving the breaker board to the front to allow more room for wiring in the back, where it would be out of the way.
I never liked mounting electronics directly to the support surface - no chance for heat to escape and what if something conductive finds its way back there. A quick look on Ebay and I found boxes of nylon standoffs, complete with screws for just a couple bucks. Note they are all threaded. I simply drilled a 7/64" hole in the plywood and the standoffs threaded right into the wood.


A bit of work and time, and the board was ready to go! Note I am using screw type terminal blocks to feed the power busses. They area also from Ebay, and include these snazzy jumper bars. I like how it turned out.


Back in the layout room, I build up a frame out of 1x2s to support the board. Wiring started immediately there after. A lot of wiring to do! But it feels good to get things moving along.

If you look closely, you'll see I added CT's on the red wires for track detection. I debated reducing the number of bus wires back to this panel and put the CTs by the feeders, or run them all back to a single point. Running them all back certainly took a lot more wire, but I think the maintenance will be easier this way. We will see. I will probably have another subpanel to marshal some of these feeders as well.
I ran out of "suitcase" connectors to connect the track feeders to the power busses, so I went on to mounding switch machines for the eastbound end of the staging yard.
More LCC equipment on the way, specifically for powering the turnout motors. I'll send out an update on that when I get further alone.


Nice work! I like your standoffs! I have mounted my boards directly and I have the same concerns about shorts that you mentioned though I think there is even more risk that something may fall on top of open boards. I may look into your standoff solution. Thanks for sharing!
ReplyDeleteThank for posting this Dave! Could you post a link to the "snazzy jumper bars"? They are just what I'm looking for....
ReplyDeleteDan
I bought the terminal blocks on eBay. Some of the vendors offer the jumper bars with the TBs, so I just bought both at the same time. Note: the spacing of terminal blocks is not always consistent, so it's probably prudent to buy both at the same time to assure a good fit.
Delete