Yes, it's been quiet on the blog, but work certainly has been happening! Of note, the C-19 bug allowed for more evenings and weekends at home to tackle a massive project. Let me explain...
The layout is double decked, without a helix to get between the decks. Well, actually, it is TRIPLE decked at the staging yard, so there IS a helix to get to that from one end. But there are no helixes between the visible decks. This was done to allow the operators to really follow their trains from point to point. But even with a "no-lix" connection, it also means there has to be a transition from where the connection between the lower deck and the upper deck... which means the scenery for some of that run will have to be associated with the lower deck, and then later with the upper deck. That makes for an interesting scenic transition.
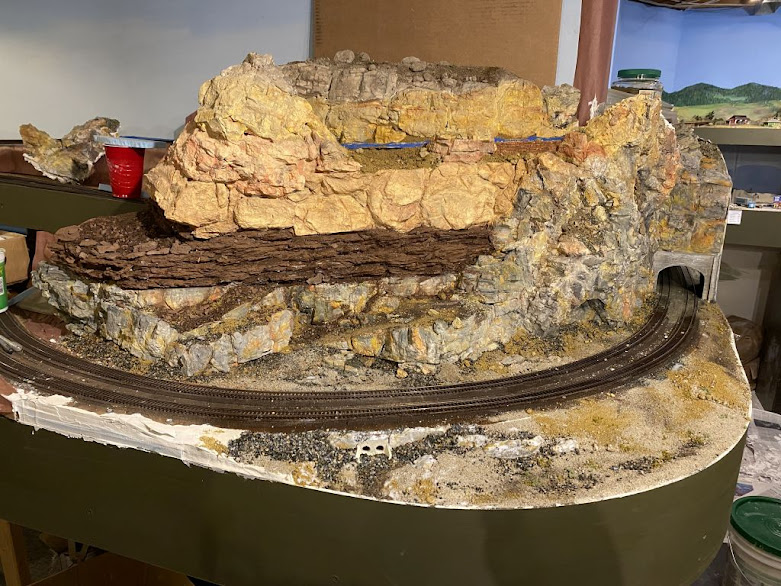
The way this is being handled on the GNW is having the lower deck include the first portion of the ramp up in the scenery with the lower deck, the transition track then ducks into a short tunnel, and then pops out of the tunnel with the associated scenery of the upper deck. The fascia transitions into some rock work at both ends. The mid part of this transition-section includes a rock face that reflects typical desert southwest sedimentary rock in a section I call Coyote Canyon.
Anyway, here are some pix that show the work and the results. Enjoy!
 |
"Main" deck is the lower track, with the transition track climbing. Upper deck is obvious and the two are not visually connected.
|
 |
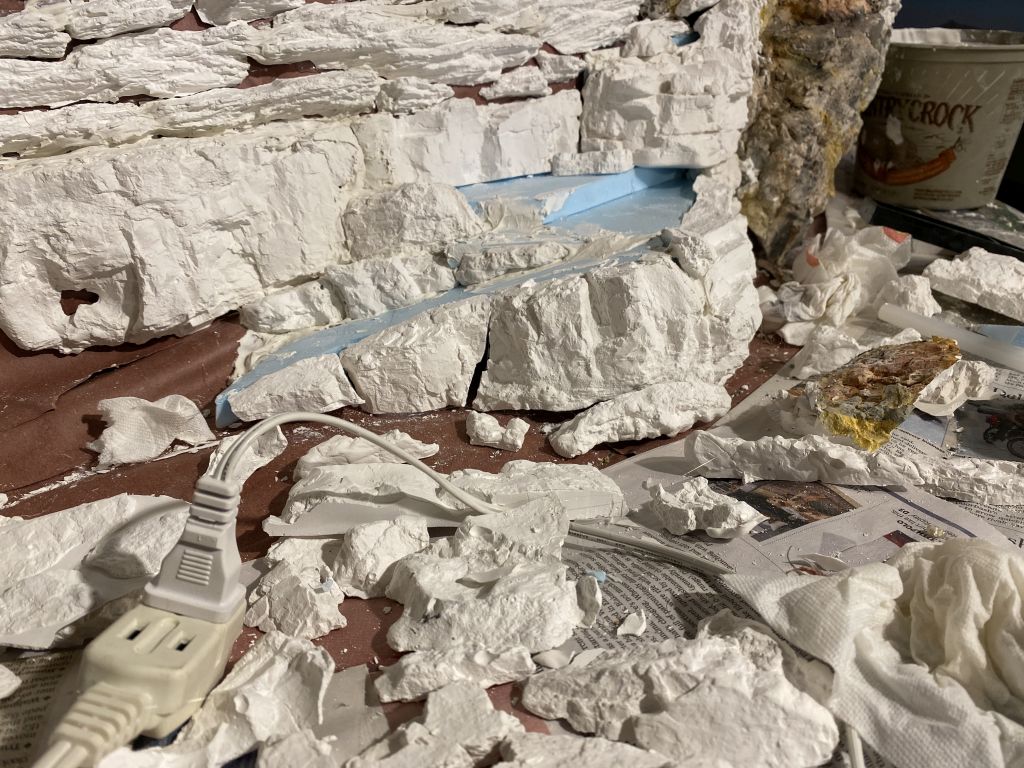
Other side of the transition showing Coyote Canyon. Note that I used a heavy paper "painted" with a thinned white glue and let dried to create a working surface for the rockwork. This prevented plaster, glue and scenic materials from dropping onto the hidden trackwork and electronics.
|
Due to the shear number of castings needed, I broke the project into two phases. This canyon took about 80# of hydrocal! A few pix of the progress on the eastern end.
 |
Note the cut-outs in the fascia. This allows access to the tracks. At some point I'll add covers...
|
 |
| Probably a couple dozen rock castings in this scene alone! |
 |
| Test loco working the hill! Note the retaining wall was made of styrene foam-core. It is held in place by magnets, allowing removal of the wall to access a track behind which connects the lower deck to staging. Never had any issues with it, but I know as soon as I make it inaccessible, something will go wrong! |
 |
A combination of castings and read dirt provide a convincing scene. The retaining wall was cast from a rubber mold.
|
While I was working this, my amazing bride was hard at work with scenery at Rosita...
Back to Coyote Canyon... after a brief respite, the main part of the scene was worked. The process involves making a bunch of rock castings, enough that there are enough to play with and try different ideas out, hot gluing them to the paper backing, painting them, weathering them (thin washes), and then adding various dirts. On an aside, my wife and I pick up buckets of dirt any time we travel. Over the years, we have assembled quite the collection!
I tried to create a classic sandstone layer in the rockwork. I had found shale on one of the trips and was able to closely match the colors.
 |
| It was amazing how much this relatively small scene consumed a shear number of castings! |
 |
| Just a flat wall is boring. Adding some depth and undulation creates interest. This will be a little 4-wheel trail. |
 |
| Rearranging piece broke out an arch. Perfect! A little cave was created. |
 |
| Almost done with the castings. Note the shale/sandstone layer. |
 |
Starting to paint. I used the cheapest water color acrylics (Walmart specials!) Note the bright yellows, oranges and tans. These are toned down in the next step with thin gray and black washes.
|
 |
After the washes created a much more realistic tonality. Note the selection of paints. Don't skimp on colors. Nature has an amazing spectrum of colors in almost any scene. Our job is to reproduce it!
|
 |
| The closeup here shows the variation of colors in the different types of rocks represented. This all takes time, but the results are oh-so worth it! |
Once the rocks are painted, adding real soils, talus, shale and the like complete the scene and provide amazing depth.
 |
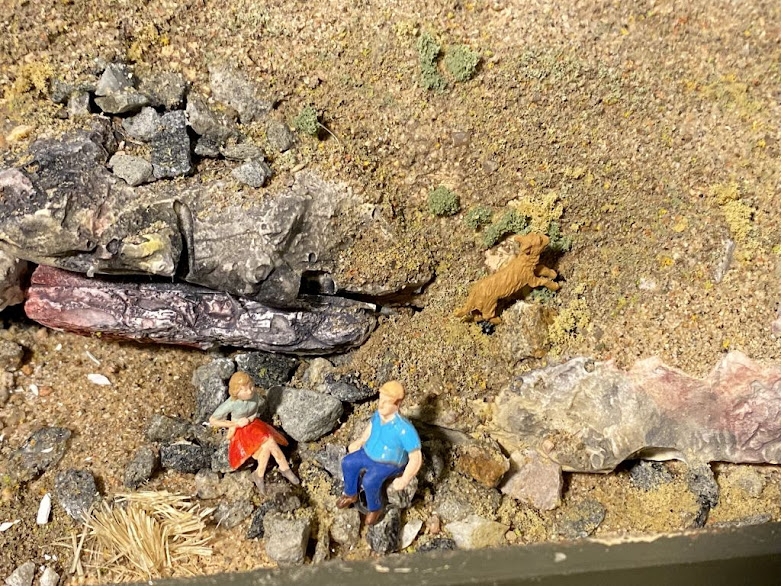
Can almost feel the heat and see the lizards!
|
Finally, going around the corner is where the transition track comes out near the upper deck. This scenery was done in a similar manner. Note the transition of the fascia.
All put together, and a few action shots of a couple trains rolling through and even a couple four-wheelers checking out a good rail-fanning vantage point!
 |
| Desert 4-wheeling is almost as much fun as model railroading! (I mean, it really is. No kidding. As in the real-deal is actually a lot of fun!) |
 |
Mixed freight X7656 is heading west, dwarfed by Coyote Canyon.
|
 |
| X7656 ready to plunge into Coyote Canyon tunnel. |
 |
X7656 is now out of the canyon, and soon will be in Valley Gate.
|
 |
| Late afternoon, and Rocky Mountain Line SD40-2s pulling a transfer run through Coyote Canyon. |
 |
| A short while later, Amtrak's eastbound San Juan rolls through Coyote Canyon. |
That's all for now!


Comments
Post a Comment