Adding Sound to a Bachmann 44-Tonner
Work and family obligations have limited time on the layout. But a few things are getting done including this sound install project. I have always had a soft spot for "critters," and the GE 44-tonner is no exception. Bachmann offers a great and fairly priced model of one, and I have one stationed at an industry on my layout. But it is silent, and was the only loco on the layout without sound. Something HAD to be done! So I found a good deal on a TSU2-1100 (TSU-2) decoder and was off on a sound install project. Follow along for some tips.
Two screws on the bottom allow the shell to just slip off. Mine was a bit sticky, so needed to gently pull to release. Once inside, I ripped out ALL of the existing electronics and lighting. I retained the plastic spacer. This will keep wiring out of the drive.
I struggled with trimming off the extra wires not needed on the decoder. It's an expensive decoder. But the added wiring will congest the install. So I just trimmed them back, but left enough that I could get to the lead if needed.
The next challenge was getting a speaker in the tight confines. I have been impressed with the iPhone 4 speakers. Full sound in a compact package, and I can find them on Ebay for about a buck each. But the speaker was still too big to fit into the Bachmann unit. So I cut off some of the resonator end of the enclosure and added a cap of styrene on the end. It does not sound AS full, but not bad at all. Surprisingly clear and full still.


Next was test fitting all the pieces. Note I had to trim away some of the edges of the plastic divider that came with the model. I also added a 16V, 1,000uF capacitor as a "poor man's stay alive" to keep the unit running over dead spots.

Here is how it looks when all put together. It all fit! (Barely)


All done, with the shell back on and back in service!


I took a brief vid of the unit in operation HERE so you can get a sense of the sound. Enjoy!
Two screws on the bottom allow the shell to just slip off. Mine was a bit sticky, so needed to gently pull to release. Once inside, I ripped out ALL of the existing electronics and lighting. I retained the plastic spacer. This will keep wiring out of the drive.
 |
| This is what the loco looks like after an electronic-ectomy. LEDs stayed behind, but that's it. |
I struggled with trimming off the extra wires not needed on the decoder. It's an expensive decoder. But the added wiring will congest the install. So I just trimmed them back, but left enough that I could get to the lead if needed.
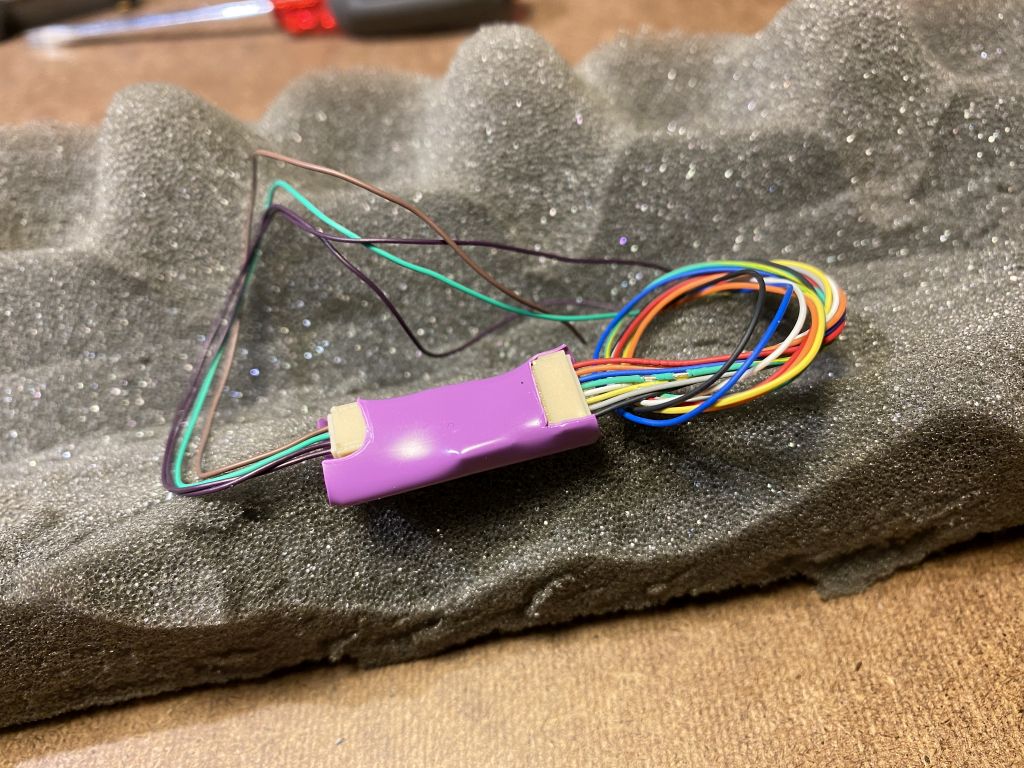 |
| The TSU-2 TSU-1100 decoder. Small and compact, it does well in a critter sound install. |
The next challenge was getting a speaker in the tight confines. I have been impressed with the iPhone 4 speakers. Full sound in a compact package, and I can find them on Ebay for about a buck each. But the speaker was still too big to fit into the Bachmann unit. So I cut off some of the resonator end of the enclosure and added a cap of styrene on the end. It does not sound AS full, but not bad at all. Surprisingly clear and full still.


Next was test fitting all the pieces. Note I had to trim away some of the edges of the plastic divider that came with the model. I also added a 16V, 1,000uF capacitor as a "poor man's stay alive" to keep the unit running over dead spots.

Here is how it looks when all put together. It all fit! (Barely)


I took a brief vid of the unit in operation HERE so you can get a sense of the sound. Enjoy!
Comments
Post a Comment