The radio silence does not mean that progress has not been happening! In fact, the main deck benchwork is complete and track is quickly being laid. Here are some highlights and commentary:
 |
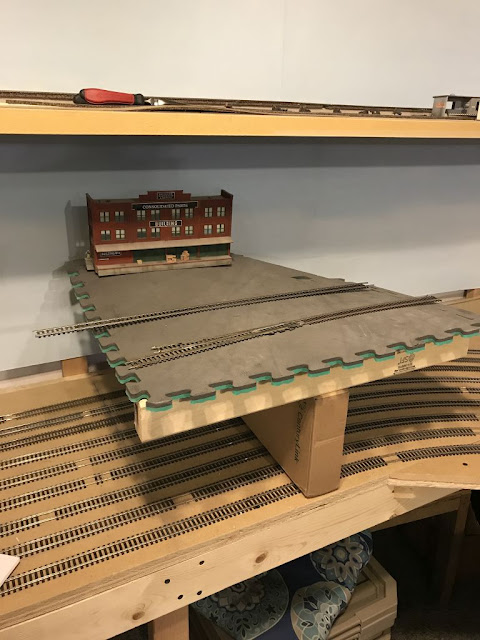
| Before building everything out, I set up a temporary mockup of the elevation the main deck will be set at. Recall there was some adjusting during design on this. Looks like it is working out! |
 |
| Next set up backdrop supports along the peninsula. |
 |
| Framing of the main deck proceeding. I built them off the layout, then set them in place. Screwed to the wall and then temp supports for the front edge. |
 |
| Pieces coming together! |
 |
| I tried joist hangers on the previous buildout and really like them. Did so again on this expansion. They look flimsy, but in reality, they are rock solid. Recall the lateral support comes from the back edge, not the front. These just provide vertical support. |
 |
| A couple more examples of the vertical support system. |
 |
| Note all the wiring for the staging level is complete. I had no desire to work in that space! Although it is wide enough to get in there for maintenance. |
 |
| Work progressing... |
 |
| On this end of the staging yard/main deck, the elevations come together. I mocked up a board to show the necessary elevations. Note that it is really tight between the tracks here. |
 |
| Another view of the situation. |
 |
| The solution was a thin-frame structure. I set 2x3's on edge, with a vertical 2x3 for the rear support. Note also the laser line. This is an awesome tool! Since elevations were critical here, and I know the floor slopes with different elevations at different places, this was super helpful in getting a good straight line to connect the new buildout to the existing layout without undulations. |
 |
| Here is the thin-frame structure installed. Note that the tracks will only cover the front 6" or so. There will be a background jumpering between the middle deck and the upper deck. That will leave the back part of this frame open to allow access for maintaining the staging yard throat. |
 |
| All done with the main deck framing! |
 |
| Adding plywood and soundboard. Soundboard is a low cost and readily available alternative to homasote. I also find it is much more dimensionally consistent. |
 |
| Tying into the existing layout. Elevations worked out perfectly! Here we are looking toward the old Valley Gate yard lead. The new crossover will be called CP Valley Gate East. |
 |
| Tracks going in! Curve is super-elevated! I am using caulk to adhere the cork and the track to the subroadbed. With apologies to my gun-adverse friends, I find the use of boxes of shells perfect for holding down tracks while the caulk sets up. |
 |
| On the other end, the tracks coming off the helix are in and transitioned onto the new deck. Look closely and the first test train is rolling! |
 |
| NEXT: Laying out and building Armstrong Yard in the city of Pinion (with appropriate head-nod to the dean of track planning). |


Super update! It is really coming together! Curious if you found a good (inexpensive) source for the foam floor tiles? One of these days we are going to have to order a bunch of them. The old ones are just too beat up to reuse on the new RR. Might be good in a barn or workshop.
ReplyDeleteDave - thanks for the kind note. The tiles came from Sams. They more-or-less worked with my old ones, but agree, can definitely tell which are new!
Delete